Intersecting Circles Shape Garden Plan Drawing
Up to at present nosotros accept discussed principles and techniques for evaluating your site, designing gardens, and selecting plants. In this module we take up the process of actually creating your garden. The following steps should get y'all started:
- Determine the weather in your garden site by doing site analysis. Compile a list of your site constraints.
- Sit downwards and think about your wants and other constraints.
Call up about your wants:
Do yous desire to enhance a view or terrain characteristic? Practice you want a colorful garden or possibly a garden that is relatively gratis of maintenance? Practise you want an in-ground watering organization? What existing features practice you want to incorporate into the design? Which existing features do yous want to become rid of? (The list goes on.)
Think nigh your constraints:
What are your site conditions (your biggest and most of import set of constraints)? What tin you afford? How much fourth dimension and effort tin can you afford to invest? Do you need to get e.k. a lawnmower to the site? (you'll need access, storage) Tin you attain the site with a garden hose? (plants need water) Tin you maintain the site? (complex gardens need a lot of maintenance) Is there some future project that has to be incorporated into the pattern? (like a pool, deck, gazebo, etc.) These are just a few possible constraints.
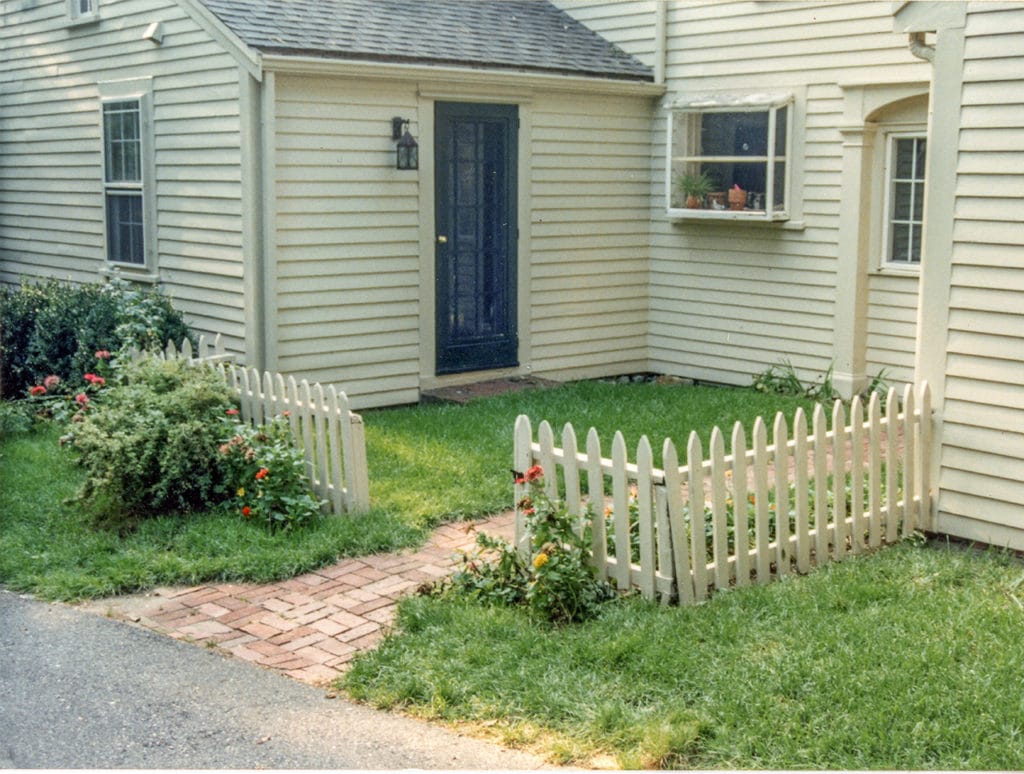
3. Look at the existing conditions and make up one's mind what stays and what goes. You lot may just want to add a few perennials, or fifty-fifty totally change the site from the footing up. If you decide to remove a lot of existing features—especially copse—consider the outcome such a removal will accept on your site weather.
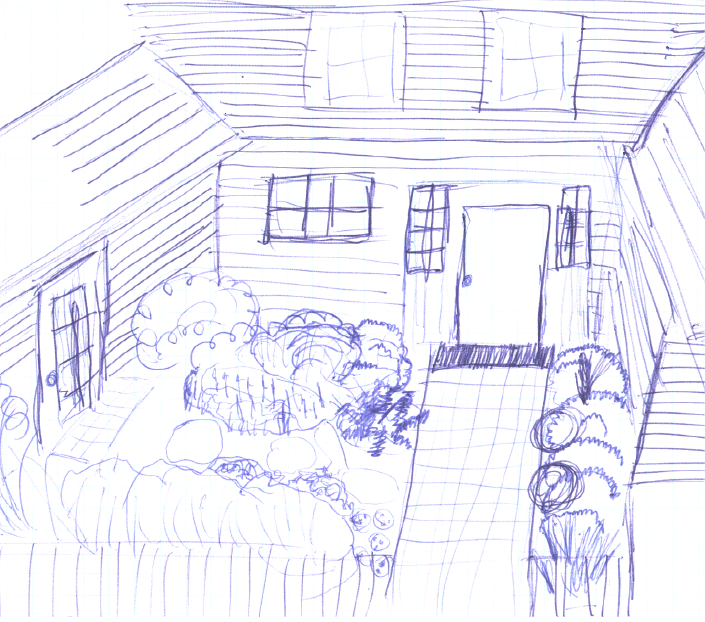
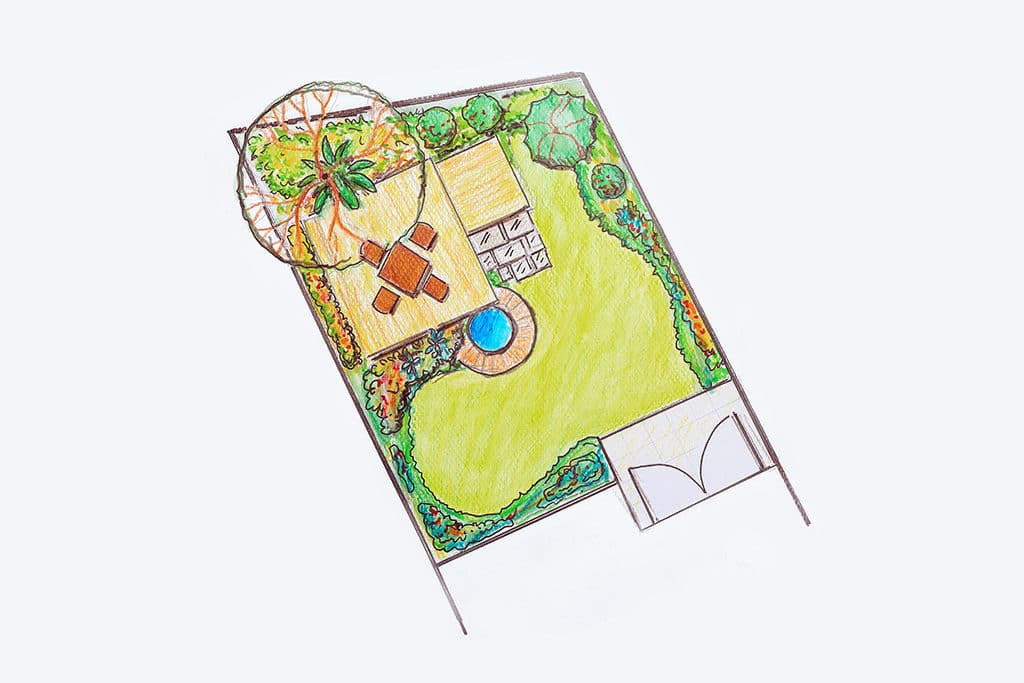
4. Now is a good time to make a simple sketch of the proposed garden. The first thing you should exercise before you start your sketch is to employ your compass to determine Truthful North so you can accurately mark and orient your garden. Your side by side step is to depict a rough sketch of your blueprint and develop your theme. Do your best, you do not need to exist an artist every bit our sample sketch illustrates. Once your rough sketch is consummate, think of how you want to arrange things, and which plants you lot desire to employ.
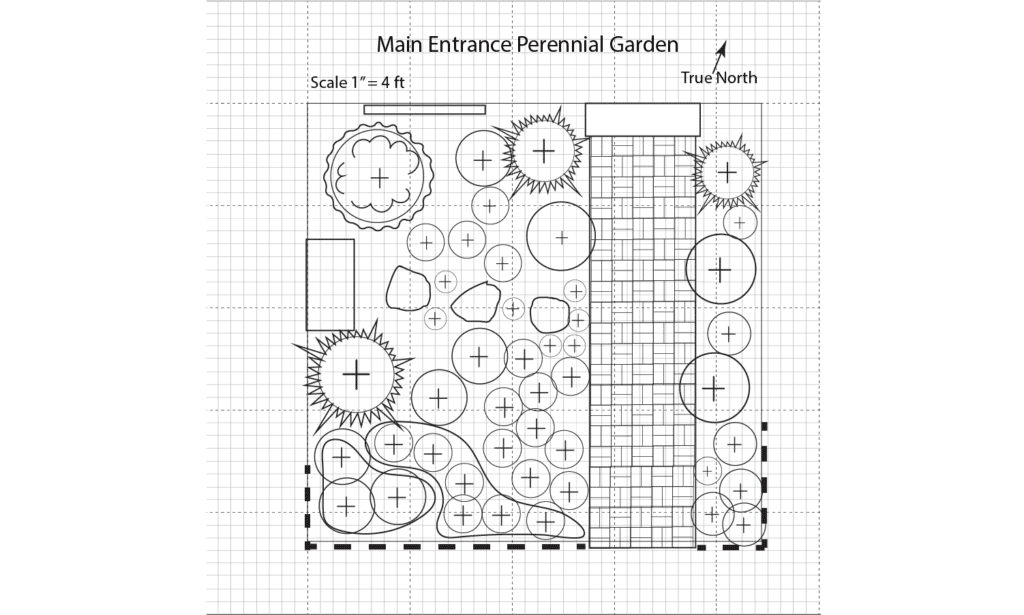
5. Initially, when you are planning a garden project, simply do a rough sketch of the plan to brainstorm to piece of work out your ideas. For many gardeners a rough sketch is all they ever demand, especially for elementary projects. For new gardeners it may be helpful, one time you have a solid concept plan in place, to make a formal garden design that is fatigued to scale. A scale drawing will human activity as a guide to use equally yous install your garden and help you make solid estimates of the number of plants needed for your garden. The central to making a calibration cartoon is to convert real-world measurements from your garden to a much smaller format that yous can put onto a slice of paper.
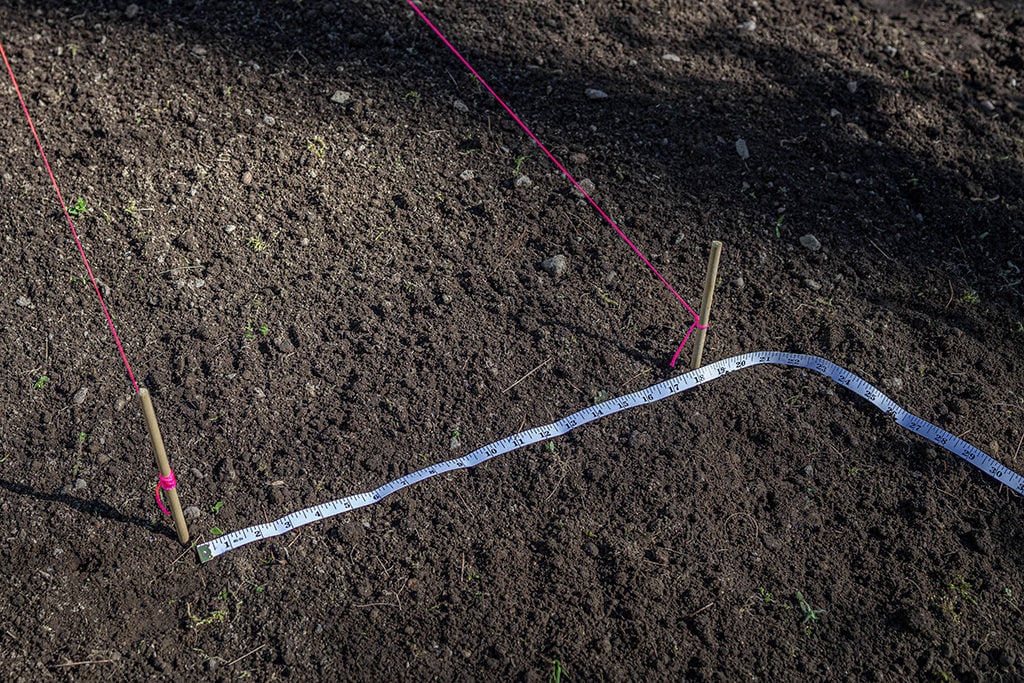
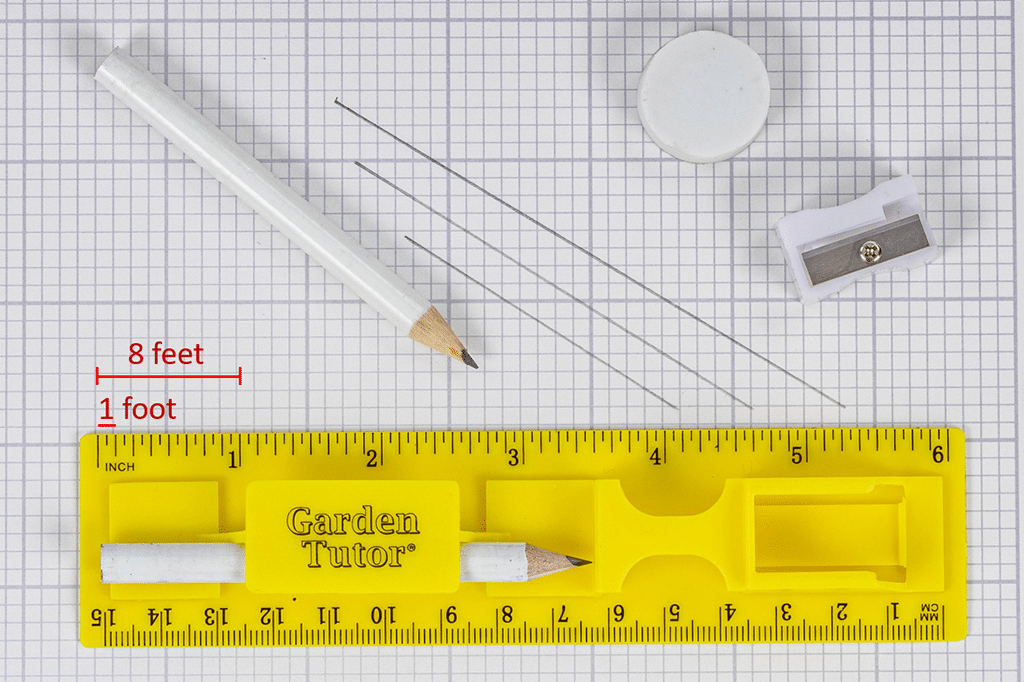
To practise this, your start step is to measure your actual garden site using the included Garden Tutor measuring tape. If your proposed garden site is large, then y'all may demand to use a tape measure out that is longer than your 5 foot measuring tape. Add these measurements on your crude sketch.
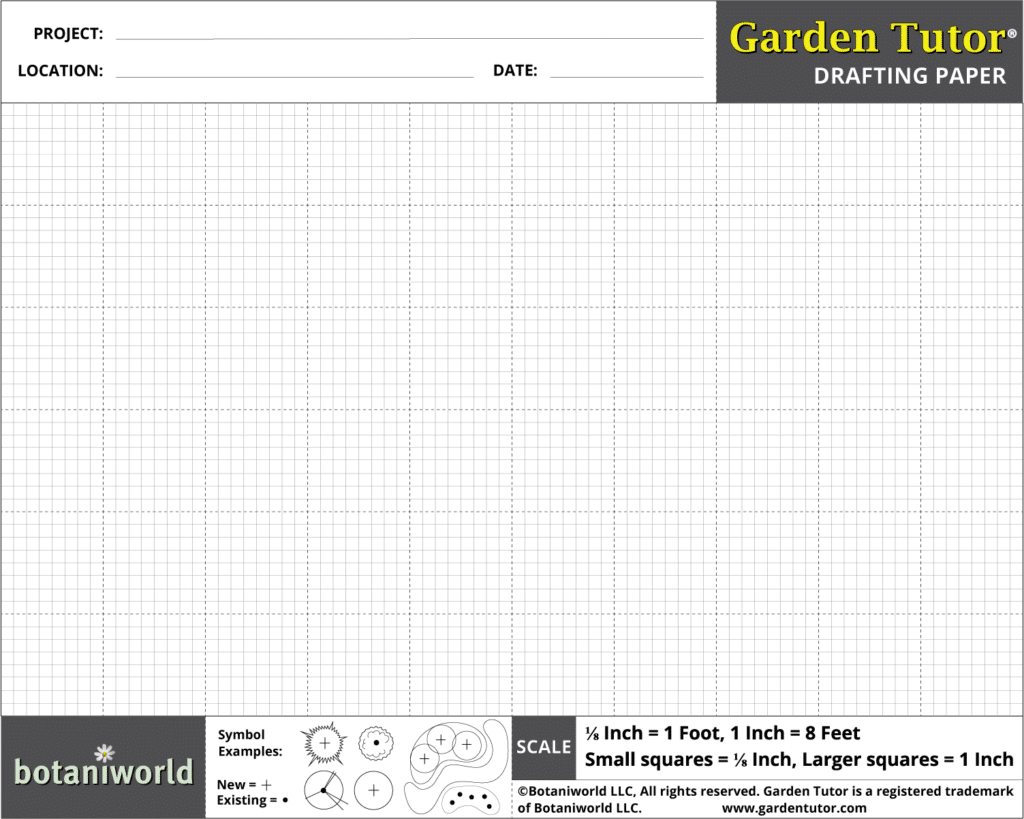
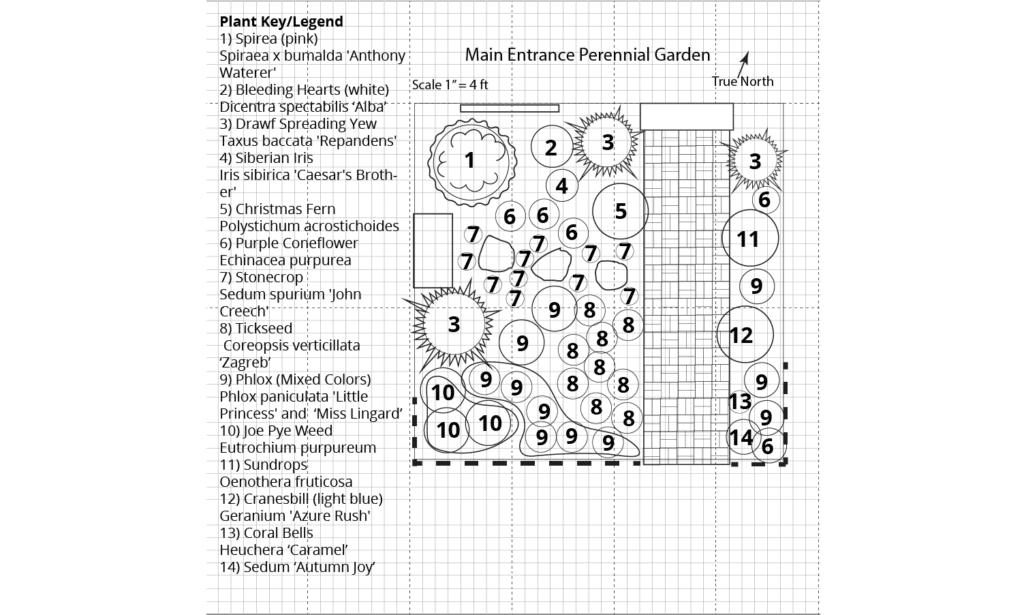
While there are many scales y'all can use, one of the easiest is, ane/8 inch = one pes (1": 8'). By using this scale each one/eight of an inch segment on your Garden Tutor ruler is equal to one human foot, so i inch on your ruler is equal to 8 feet. This is a perfect scale to use with your Garden Tutor drafting tools and measuring tape. In add-on, we have adult custom garden design graph newspaper that is set up upwardly using a ⅛" scale. It is available in the "Toolbox" expanse of the Garden Tutor site under "Garden Pattern and Layout". All you have to practise is download and impress a copy and you will be prepare to create a calibration drawing. If you have a smaller garden and want to increase the scale you tin conform your scale to something similar ane/4" Scale whereby 1" = 4ft. Then on the Garden Tutor Drafting newspaper 2 small squares = i/4" which is equal to 1 foot.
After setting your scale and drawing your garden beds you tin can begin to add the plants. Design the garden with the plants mature sizes in mind (often found on constitute labels or horticultural sites that detail individual plants) and make sure to follow the aforementioned scale you are using for the garden bed.
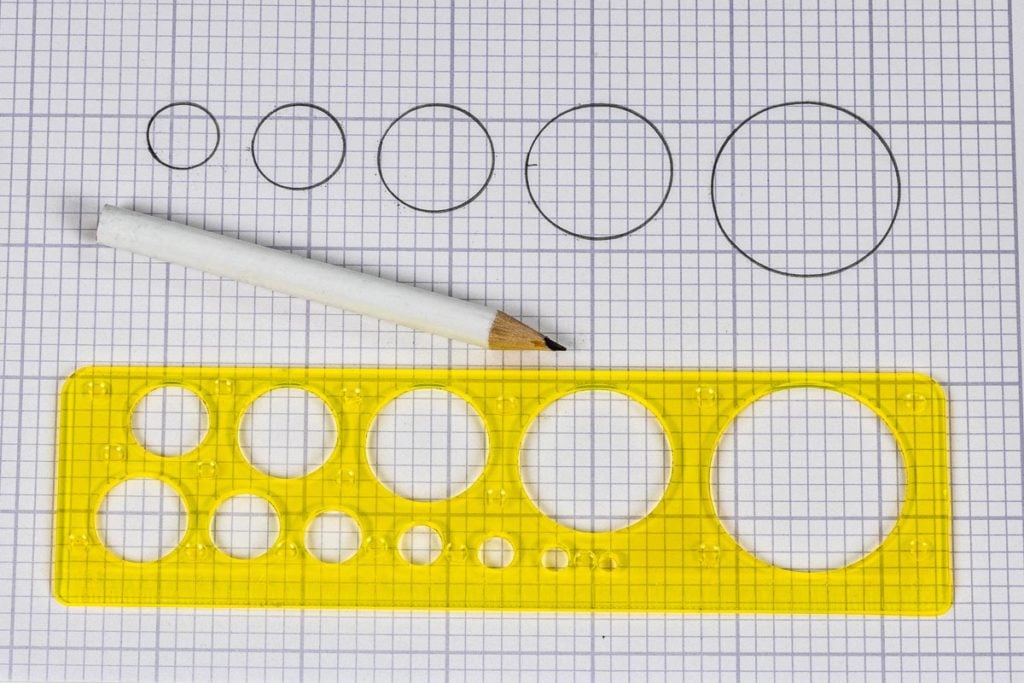
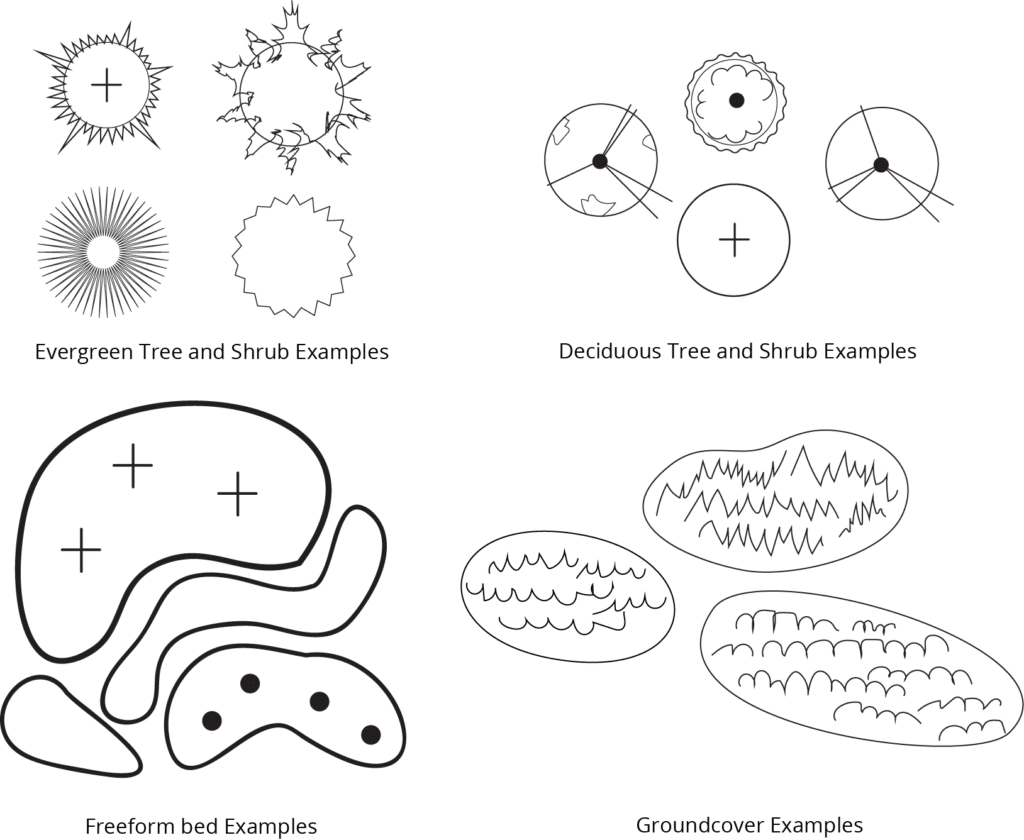
In your Garden Tutor kit we provide a circumvolve template that is designed to help you draw individual plants in your garden. Once you accept found the correct sized circle to employ you can create various plant symbols. The circles you describe with the circumvolve template tin be stylized to farther identify the plants past blazon such every bit evergreen or deciduous or to show if they are new or existing plants. The "Garden Blueprint and Layout" expanse under the "Toolbox" menu provides a list of common symbols that you tin use.
Another approach for groups or masses of plants is to draw the private plants equally simple overlapping circles and and then outline the group or mass and stylize it as a whole. There are many ways to build and stylize your garden design and it is actually up to you lot how detailed you want to brand it. Some gardeners use color pencils, design beautiful landscape symbols, use tracing newspaper to create a final line complimentary blueprint, and turn the design itself into a work of art suitable for framing. Others just make a elementary sketch with a serial of freeform bubbles to represent various planting groups with a few individual plants highlighted as needed.
6. Once you lot have a rough sketch or a formal design, you will want to create a key so that y'all can characterization the different symbols and other features of the garden. Often it is easiest only to use numbers on the blueprint so create a key on a divide piece of paper that lists the plant names that represent to each number on the plan. Using a separate constitute list is also helpful if you want to brand changes to the plants you select.
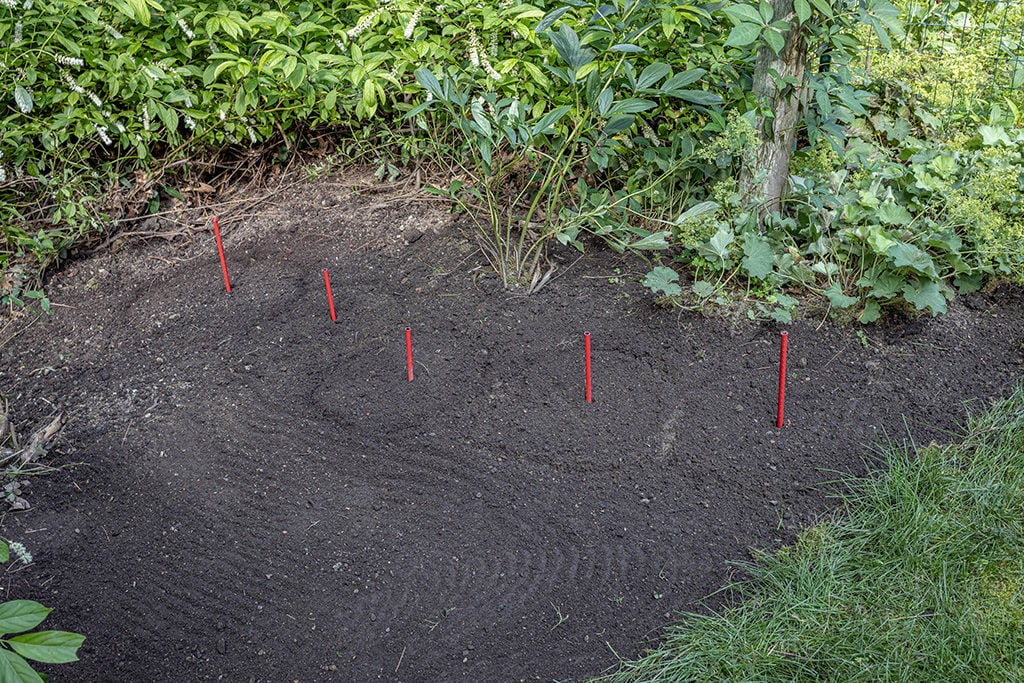
7. At this signal you lot will need to calculate the number of plants you need. Y'all tin exercise this past referring to your calibration drawing and adding upwardly all the plants listed. If you did not make a scale drawing yous can measure the actual planting locations in your site based on the found spacing requirements and mature size calculations. Put stakes where each found should go and count the stakes.
If you are an experienced gardener, you lot can walk through the garden site and estimate the number of plants you'll need past visualizing them in mature course.
viii. Finalize your plan and make sure you've satisfied all of your wants and constraints. Double check placements and make whatever last-minute changes in your design.
ix. Gear up the site (side by side module) and buy your plants.
Source: https://gardentutor.com/modules/design-how-to-layout-a-garden/
0 Response to "Intersecting Circles Shape Garden Plan Drawing"
Postar um comentário